


Installing a centrifugal pump correctly isn’t just about following instructions—it’s about safeguarding your entire industrial operation. Proper installation reduces downtime by up to 40% and extends equipment life by 5-10 years, making it one of the most critical investments in your facility’s efficiency.
At MRP Pumps, we’ve seen countless installations that could have saved thousands in maintenance costs with the right approach from day one. This comprehensive guide walks you through every essential step, from foundation preparation to start-up procedures, ensuring your centrifugal pump delivers optimal performance for years to come.
What Makes Centrifugal Pumps Essential for Industrial Operations?
Centrifugal pumps are the workhorses of industrial facilities, handling everything from water circulation to chemical processing. These mechanical marvels use rotating impellers to create centrifugal force, moving fluids efficiently through your systems.
Key industrial applications include:
- Water treatment and circulation systems
- Chemical and petrochemical processing
- HVAC systems in large facilities
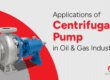
- Oil and gas operations
- Food and beverage production
- Mining and slurry handling
The beauty of centrifugal pumps lies in their simplicity and reliability. However, even the most robust pump can fail prematurely without proper installation.
Why does correct Centrifugal Pumps installation matter so much?
Proper installation ensures optimized performance with intended flow rates and pressure without wasting energy. It dramatically reduces unplanned downtime, keeping your processes running smoothly. Most importantly, it maximizes your return on investment by extending component life and maintaining warranty coverage.
Ready to ensure your pump installation is done right?
Contact MRP Pumps for professional installation services.
How Should You Prepare Before Installing Your Centrifugal Pump?
Preparation separates successful installations from costly mistakes. Before touching any equipment, you need a systematic approach that covers documentation, safety, and site readiness.
What Documentation Do You Need to Review First?
- Start with your manufacturer’s manual—it contains critical specifications unique to your pump model. Generic installation guides can’t replace these specific requirements.
- Check your pump’s delivery condition immediately upon arrival. Document any transport damage with photos before proceeding. This protects you from warranty issues and ensures you’re working with undamaged equipment.
- Verify your site specifications match the pump requirements, including electrical supply, space clearances, and environmental conditions.
What Safety Equipment and PPE Are Required?
Industrial pump installation involves heavy machinery, electrical work, and potentially hazardous environments. Never compromise on safety equipment.
Essential PPE includes:
- Hard hats and safety glasses
- Steel-toed boots with slip-resistant soles
- Work gloves rated for mechanical hazards
- High-visibility clothing in active facilities
Additional safety measures:
- Lockout-tagout (LOTO) procedures for electrical safety
- Proper lifting equipment for heavy components
- Emergency contact information readily available
What Tools and Equipment Should You Gather?
Having the right tools prevents delays and ensures precision. Missing tools often lead to improvised solutions that compromise installation quality.
Essential alignment tools:
- Laser alignment systems or dial indicators
- Precision spirit levels
- Feeler gauges and straight edges
General installation tools:
- Torque wrenches with proper specifications
- Pipe fitting tools and wrenches
- Electrical testing equipment
- Measuring devices and rulers
How Do You Prepare the Perfect Foundation?
A solid foundation is literally the bedrock of reliable pump operation. Poor foundation preparation causes 60% of premature pump failures through vibration and misalignment issues.
What Are the Foundation Requirements?
Your foundation must support the pump’s weight while absorbing operational vibrations. Use reinforced concrete with minimum compressive strength as specified in your pump manual—typically 3,000-4,000 PSI for most industrial applications.
Critical foundation specifications:
- Surface flatness within 0.05mm per 1,000mm
- Adequate size to distribute load evenly
- Proper drainage to prevent water accumulation
Step-by-Step Centrifugal Pump Installation Process
Step 1: Position the Pump and Motor
Begin by placing the pump and its driver (such as an electric motor) on the foundation. Ensure both are oriented correctly according to your design and there is enough space for coupling accessories and maintenance access.
Step 2: Align the Pump and Driver
Shaft alignment is critical for reliable operation. Use precision tools (like laser alignment or dial indicators) to align the pump and driver shafts both horizontally and vertically. The coupling gap and parallelism should follow manufacturer tolerances—typically within 0.002 inches. For self-priming pumps, pay special attention to suction piping slope: it should rise consistently toward the pump with no high points.
Step 3: Connect Suction and Discharge Piping
Install the suction and discharge piping, supporting them independently (not on the pump). Use gradual reducers and avoid sudden changes in direction to eliminate air pockets and reduce wear. For abrasive or slurry applications, use wear-resistant pipes and limit the number of bends.
Step 4: Prepare the Foundation
Ensure the base is flat, clean, and has the required compressive strength. Install anchor bolts and use non-shrink grout beneath the baseplate. Allow proper curing before proceeding.
Step 5: Bolt the Unit Down and Re-Verify Alignment
Progressively tighten anchor bolts. Re-check and fine-tune alignment as tightening can introduce small shifts. Your pump and driver shafts should remain perfectly aligned after bolting.
Step 6: Electrical Connection and Safety Checks
Wire up the motor to the correct voltage supply using cables of appropriate gauge. Ensure correct earthing and follow lockout-tagout (LOTO) procedures. Confirm correct rotation direction and safe connections prior to any trial run.
Step 7: Install Seals and Lubricate Bearings
Install mechanical or packing seals according to manufacturer instructions. Use only the recommended lubricants for bearings and moving parts. For some pumps, over-lubricating is as dangerous as under-lubricating, so stick to the prescribed quantity and schedule.
Step 8: Prime the Pump and Remove Air
Fill the pump and suction line with liquid. Open air vents or plugs to let out trapped air until only liquid flows—never start a centrifugal pump dry. This prevents seal and bearing failure.
Step 9: Initial Start-Up and System Checks
Start the pump with the discharge valve initially closed. Slowly open the discharge valve as the pump reaches operating speed. Monitor for abnormal vibration, temperature, or noise. After running for a short period, stop the pump and recheck alignment, bolts, seals, and lubrication.
Step 10: Monitor and Maintain
Initiate your scheduled inspection routine immediately. Log running parameters, watch for any deviation, and respond quickly to leaks, vibrations, or unusual readings.
How Do You Maintain Your Pump After Installation?
Installation success is measured in years of reliable operation, not just successful startup. Proper maintenance extends pump life by 300-500% compared to neglected equipment.
What Daily Checks Should You Perform?
- Listen for changes in sound that might indicate developing problems. Experienced operators can often detect issues before instruments show problems.
- Check for new leaks or vibrations that weren’t present during initial operation. Early detection prevents minor issues from becoming major failures.
- Verify proper lubrication levels and add lubricant as needed according to your maintenance schedule.
What Weekly Inspections Are Critical?
- Examine seals and packing for excessive wear or leakage. Replace worn components before they fail completely and damage other parts.
- Check coupling alignment if accessible. Misalignment often develops gradually due to foundation settling or thermal effects.
- Review operating parameters against baseline readings to identify trends that indicate developing problems.
Common Installation Mistakes to Avoid
Even seasoned professionals sometimes overlook critical details. Avoid these common pitfalls to ensure long-term reliability:
- Skipping Alignment Checks: Rushing installation often means skipping precise alignment. This results in excessive vibration and rapid wear.
- Ignoring Manufacturer Guidelines: Assuming all pumps are the same leads to errors. Always consult the specific MRP Pumps manual.
- Improper Foundation Preparation: Cutting corners on concrete curing, leveling, or vibration isolation leads to long-term problems.
- Forcing Pipe Connections: Forcing pipes into position stresses the casing, leading to cracks or leaks.
- Neglecting Priming: Failing to bleed air or starting the pump dry almost always results in immediate seal/bearing failure.
- Over/Under-Lubrication: Not following recommended lubrication intervals or overfilling can shorten bearing life and increase breakdowns.
- No Safety Protocols: Omitting PPE, lockout-tagout, or electrical safety introduces preventable risk.
Keep these in mind during every installation!
Need help developing a comprehensive maintenance program?
MRP Pumps offers training and support services to keep your equipment running reliably.
What Safety Guidelines Must You Follow Throughout Installation?
Safety isn’t just about avoiding accidents—it’s about creating sustainable practices that protect people and equipment long-term. Proper safety procedures prevent 99% of installation-related injuries while ensuring quality work.
1. What Are the Essential Safety Protocols?
Implement lockout-tagout procedures for all electrical and mechanical work. This isn’t optional—it’s often legally required and always safety-critical.
Maintain clean, organized work areas to prevent trips, falls, and tool-related injuries. Cluttered workspaces cause accidents and reduce work quality.
Keep emergency contacts and procedures readily available. Know who to call for medical emergencies, equipment problems, and environmental issues.
2. How Do You Handle Heavy Equipment Safely?
Use proper lifting equipment rated for the loads you’re handling. Never exceed equipment capacity or improvise lifting solutions.
Plan lifting operations carefully with clear communication between all team members. Establish hand signals and safety zones before moving equipment.
Inspect lifting equipment before each use to ensure it’s in safe working condition. Damaged slings, chains, or hoists can fail catastrophically.
When Should You Consider Professional Installation Services?
While many facilities have skilled maintenance teams, some installations benefit from specialized expertise. Professional installers reduce installation time by 40-60% while ensuring optimal results.
What Situations Require Professional Help?
Large or critical installations where downtime costs exceed installation costs should use experienced professionals. The expertise investment pays for itself in reliability.
Complex system integration with existing equipment often requires specialized knowledge of compatibility and control systems.
Warranty and compliance requirements may mandate certified installers to maintain coverage and meet regulatory standards.
What Are the Benefits of Professional Installation?
Specialized tools and expertise ensure precision work that extends equipment life. Professional installers have access to alignment equipment and techniques not available to most facilities.
Warranty protection often requires professional installation or specific certification levels. This protection can save thousands in repair costs.
Faster completion times with fewer startup problems reduce overall project costs and get your systems operational sooner.
When to Hire Professionals for Installation
While many organizations have skilled technical staff, there are times when calling in dedicated pump installation experts is the wisest move:
- Large or Critical Installations: For complex, high-value, or safety-critical systems, expert installers ensure flawless execution.
- Lack of Tools or Experience: If you’re missing alignment tools, testing equipment, or expertise in a certain area, let specialists handle the job.
- Troubleshooting Recurring Failures: Repeated issues, excessive vibration, or rapid wear often signal foundational install problems only a pro can diagnose.
- Upgrades, Retrofits, or Full System Overhauls: For existing plants, professionals can front-load design, compatibility, and controls integration.
- Warranty & Compliance: Using certified installers may be required to maintain warranty or meet regulatory standards.
MRP Pumps offers installation and technical support services tailored for your needs—contact us for project guidance or on-site help.
Conclusion
Getting industrial pump installation right pays off with higher efficiency, lower lifetime costs, and greater peace of mind. Armed with expert advice and by following your MRP Pumps manual, you’ll enjoy reliable operation for years.
Need support, installation service, or replacement parts?
Contact the expert team at MRP Pumps for friendly guidance, a custom quote, or on-site training for your next project.
Explore our full pump product range—and let’s keep your plant flowing smoothly.
Visit mrppumps.com or reach out to our experts today!
FAQs
Check with a dial gauge or laser alignment tool. Noticeably less vibration and bearing temperature spikes are signs of good alignment.
Running dry causes rapid seal and bearing failure—always prime before starting.
Rushing alignment, neglecting seal checks, improper foundation preparation, and starting without priming are the most frequent errors.
Follow your model’s maintenance schedule but check at least weekly and more often for 24/7 or harsh-service pumps.
They’re strongly advised wherever pipe movement, temperature change, or vibration could affect your pump and piping system.